Acrylic nails are a popular choice for many due to their durability and aesthetic appeal. However, when it comes time to remove them, it’s crucial to do so safely to avoid damaging your natural nails. This guide will walk you through the process, providing tips and insights to ensure your nail health remains intact.
Why Safe Removal is Important
Removing acrylic nails incorrectly can lead to several issues, including:
- Nail Damage: Forcing acrylic nails off can peel away layers of your natural nail, leading to thinning and brittleness.
- Infections: Improper removal can create small tears or openings in your natural nails, providing entry points for bacteria and fungi.
- Pain and Discomfort: Removing acrylic nails without proper care can be painful and cause prolonged discomfort.
Dr. Amy Wechsler, a board-certified dermatologist at Mount Sinai Hospital, emphasizes, “Never try to forcefully remove acrylic nails as it can damage your natural nails.”
Essential Supplies for Safe Removal
Before you begin, gather the following supplies:
- Acetone-based nail polish remover
- Cotton balls or pads
- Aluminum foil
- Nail file
- Cuticle pusher or orangewood stick
- Buffer
- Moisturizing hand cream or oil
- Warm water and dish soap
Step-by-Step Guide to Removing Acrylic Nails
1. Preparation
Start by preparing your workspace. Ensure you have all your supplies within reach and a comfortable place to sit. Cover the area with an old towel or newspaper to protect surfaces from spills.
2. Trim and File
Using a nail clipper, trim the acrylic nails as short as possible. Be careful not to cut your natural nails underneath. Next, use a nail file to gently file off the top layer of the acrylic. This helps to break the seal and allows the acetone to penetrate more effectively.
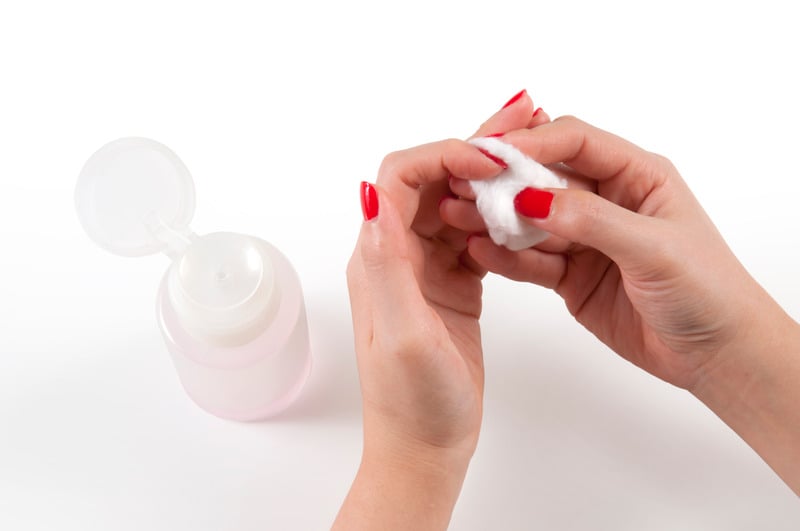
3. Soak in Acetone
Soaking in acetone is the most effective method for dissolving acrylic nails. A study published in the Journal of Cosmetic Dermatology found that acetone-based nail polish remover is the most effective method for removing acrylic nails.
Steps:
- Soak a cotton ball or pad in acetone-based nail polish remover.
- Place the soaked cotton on top of your nail.
- Wrap a small piece of aluminum foil around your fingertip to hold the cotton in place.
- Repeat for all fingers.
4. Wait Patiently
Let your nails soak for about 20-30 minutes. The acetone will dissolve the acrylic, making it easier to remove. Be patient during this step; rushing can lead to damage.
5. Check and Remove
After soaking, gently check if the acrylic has softened. Use a cuticle pusher or orangewood stick to gently push off the dissolved acrylic. If the acrylic does not come off easily, soak for an additional 10 minutes.
Anna Rushen, a celebrity nail artist, advises, “Use an acetone-based nail polish remover to dissolve the acrylic, but be cautious as it can dry out your nails” (Vogue).
6. Soak in Warm Water
For any remaining acrylic, soak your nails in warm water with a few drops of dish soap. This helps to soften the acrylic further. Emily Rudman, founder of Olive & June, suggests, “Soak your nails in warm water with dish soap to soften the acrylic before removing it with a cuticle pusher.”
7. Final Removal
Gently push off any remaining acrylic. Avoid using excessive force. If necessary, repeat the soaking steps until all acrylic is removed.
8. Buff and Moisturize
Once the acrylic is completely removed, use a nail buffer to smooth out the surface of your natural nails. This step helps to remove any remaining residue and smooths the nail surface.
Apply a generous amount of moisturizing hand cream or oil to your nails and cuticles. This step is crucial as acetone can be very drying. Massage the moisturizer into your nails and cuticles to restore moisture.
When to Seek Professional Help
If your acrylic nails are particularly thick or difficult to remove, consider seeking professional help. Michelle Humphrey, a licensed nail technician, advises, “Consider professional removal if your acrylic nails are thick or difficult to remove on your own.”
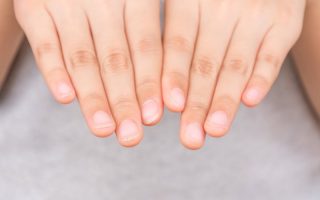
Maintaining Nail Health Post-Removal
After removing your acrylic nails, it’s essential to take care of your natural nails to ensure they remain healthy and strong.
1. Hydration is Key
Moisturize your nails and cuticles regularly. Use hand cream, cuticle oil, or natural oils like jojoba or almond oil to keep them hydrated.
2. Nail Strengtheners
Consider using a nail strengthener to help rebuild your natural nails. Look for products that contain ingredients like keratin, biotin, and calcium.
3. Avoid Harsh Chemicals
Limit exposure to harsh chemicals and detergents. Wear gloves when doing household chores to protect your nails.
4. Regular Trimming and Filing
Keep your nails trimmed and filed to prevent breakage. Use a fine-grit nail file to maintain a smooth edge.
5. Give Your Nails a Break
Allow your nails to breathe between acrylic applications. This gives them time to recover and regain their natural strength.
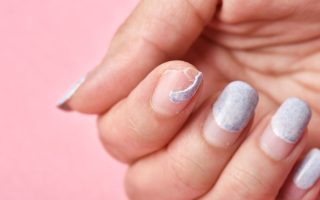
Understanding the Risks of Acrylic Nails
While acrylic nails can be beautiful and durable, they also come with risks if not properly maintained and removed. A study published in the International Journal of Dermatology compared the effects of different nail removal techniques and found that improper removal can lead to significant damage to natural nails.
Potential Risks
- Thinning of Natural Nails: Repeated application and removal of acrylics can thin out your natural nails, making them weak and prone to breaking.
- Infections: Gaps between the acrylic and natural nail can trap moisture and create an environment for bacteria and fungi to grow.
- Allergic Reactions: Some people may develop allergic reactions to the chemicals used in acrylic nails, leading to redness, itching, and swelling.
Benefits of Proper Nail Care
Proper nail care, including the safe removal of acrylics, offers several benefits:
- Healthier Nails: Reduced risk of infections and damage.
- Aesthetically Pleasing: Well-maintained natural nails look better and feel stronger.
- Comfort: Avoiding pain and discomfort associated with damaged nails.
Personal Insights and Anecdotes
Having gone through the process of removing acrylic nails myself, I understand the importance of patience and proper technique. Rushing the removal process can lead to painful and damaged nails. Taking the time to soak and gently remove the acrylic has always resulted in healthier natural nails for me.
One time, I tried to peel off the acrylic nails without soaking, thinking it would save time. It ended up damaging my natural nails, making them weak and brittle. Since then, I’ve always followed the proper steps and noticed a significant improvement in my nail health.
Conclusion
Removing acrylic nails safely is a process that requires patience and the right techniques. By following the steps outlined in this guide, you can ensure that your natural nails remain healthy and strong. Remember, never forcefully remove acrylic nails, use acetone-based removers cautiously, and consider professional help if needed.
Regular nail care and proper hydration are key to maintaining healthy nails post-removal. By taking these precautions, you can enjoy beautiful, healthy nails, whether you choose to wear acrylics again or embrace your natural nails.
Sources:
- Dr. Amy Wechsler, Mount Sinai Hospital
- Anna Rushen, Vogue
- Emily Rudman, Olive & June
- Michelle Humphrey, Licensed Nail Technician
- Journal of Cosmetic Dermatology
- International Journal of Dermatology
By following these tips, you can enjoy the benefits of acrylic nails without compromising the health of your natural nails.